Author: Faison Zutavern

  • How I Made a Flexible Resume Builder using Backbone and ES6 Modules

    When looking for a new job in Web Development, you always seem to need two things: a resume and a code example. The last 2.5 years of my code, at least the code applicable to my job search, is owned by my previous employer. So I didn’t have any code examples handy that I would be proud to share with a potential employer. And since I needed to update my resume, the obvious solution to both problems was to create a resume builder in WordPress.

    The Plan

    I wanted to make a JS driven Resume Builder where I could:

    1. Dynamically add in fields from a limitted set of field types
    2. Drag-n-drop to sort those fields
    3. Easily add new field types by defining a few values and a template

    Basically, think ACF’s Flexible Content Field, but less fancy.

    Based on my old resume, there are a few types of field I would need:

    • Section title – Just a text box that becomes a header on the front end
    • Subsection title – Might be useful, a smaller header on the front endd
    • List – A collection of text boxes that I can dynamically add to and sort
    • Experience – A catch all for both work and education experiences. Includes the name of the place I got the experience from, a title field, and a start/end date.

    For context, here’s a quick mockup of my old resume that I used in development

    Hand "drawn" mockup of my old resume

    Finally, I wanted to make sure that I used:

    • ES6 Modules – because it makes file management so much nicer and allows solid control over what functionality and variables are exposed to other bits of JavaScript
    • Handlebars – because I’ve had good success using it for templates before
    • Backbone – because I needed something to manage my models and views with and WordPress already has it baked in the backend

    The Process

    I had experience with most of what I wanted to accomplish, but not all together, so I ended up using a process like this:

    1. Write some test code using hard coded data
    2. Extract what I needed from the test code and put it into a module file
    3. Remove hard coded dependencies

    The Story

    So after getting some base code in place, I started with creating some Backbone Views for the Resume Builder, a Section Title and a Subsection Title, and hooking up some buttons to let me add one of those fields to the builder.

    Initial Backbone Views with ability to add fields

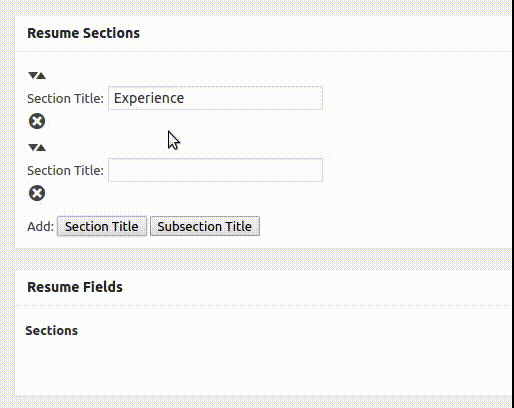
    The trickiest part here was making sure that I built out the fields in a way where I could plug in any type of field. To do that, I grabbed a pencil and some paper to break down what each View would be.

    Resume Builder Views Breakdown

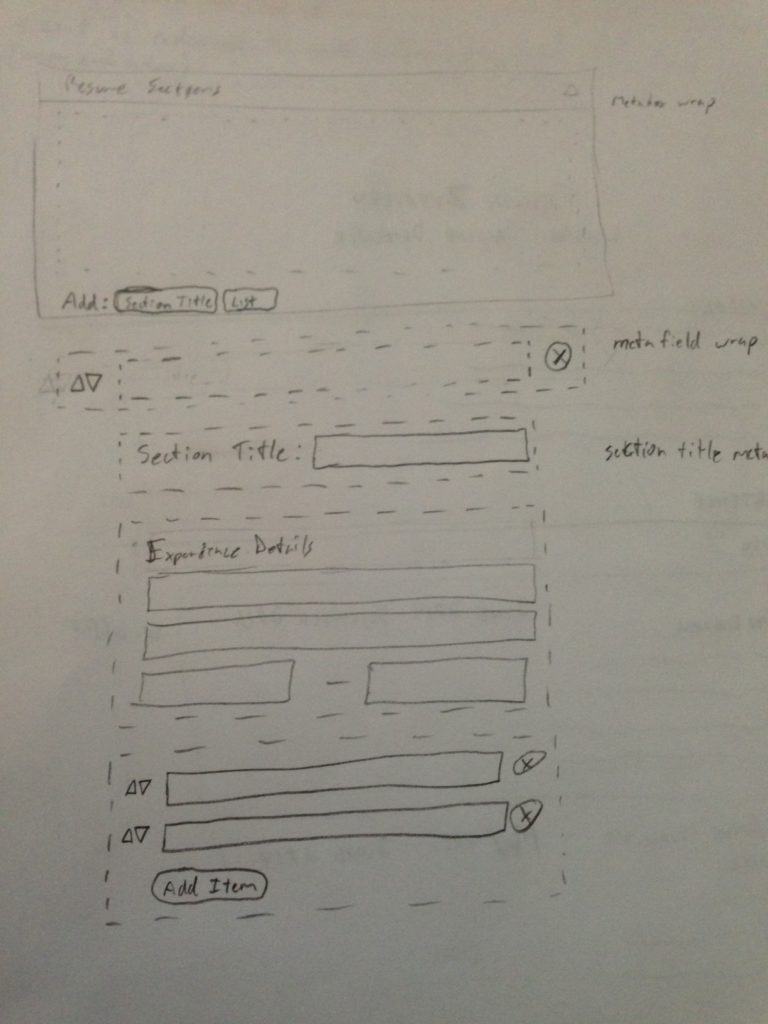
    As you can see, that’s a few Views.

    By building out the views like that, I was then able to create a new template for the Experience Field that could be plugged into that “meta field wrap”. Also, somewhere in this step, I updated my code to use a JSON object that defined the types of fields used in the Resume Builder, making the views less dependent on hard coded values.

    Added support for dynamically adding field types to the resume builder

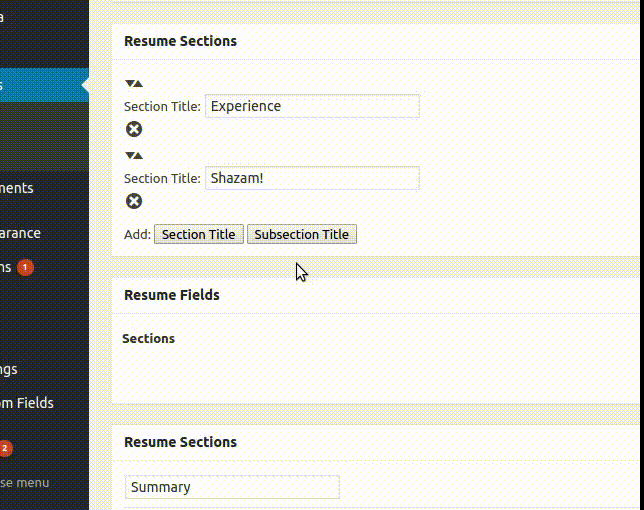
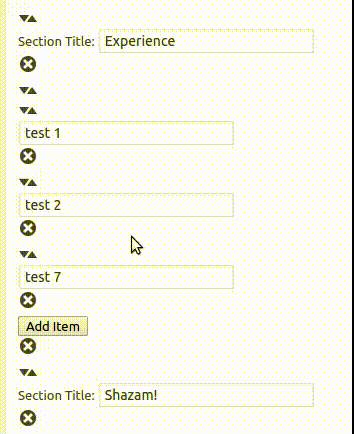
    If you’ve been counting, that’s three out of the four planned field types. I still needed to add the list field type, which is the most complex field type planned. Interesting enough, the work was pretty similar to the work I already did on the resume builder, except I only had to worry about one field type!

    The list field type is added and fully functional

    Finally, with the last field type working fully, I could move on to styling the builder. It might have been a pain to look at during development, but I would rather have it look ugly while developing and style it once at the end than style it up front a little bit and continue to touch it up as I go on. I’m not a front end guy, so that may have played a role in my decision too.

    The resume builder, functional and styled

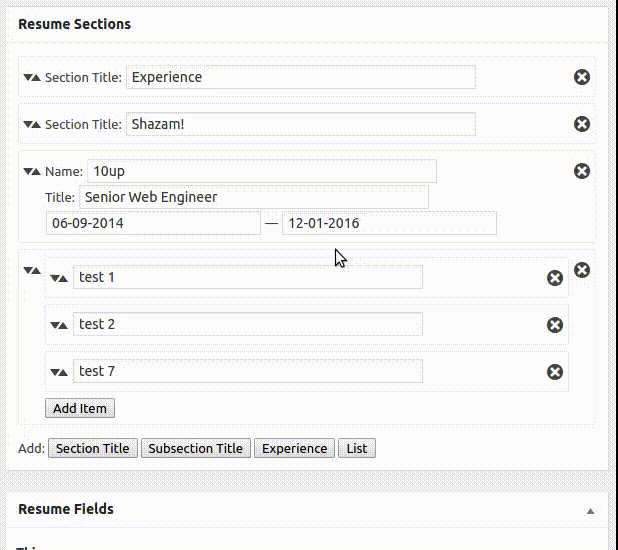
    Not the prettiest looking tool, but nice enough for me to build out my resume!

    For the final part, and there are no GIFs for this, I moved all the field definitions to PHP and passed them up to the JS via wp_localize_script(), also added the ability to save/sanitize the data entered into the resume builder, passed that saved data up to the JS when editting the page, and created a page template for displaying the resume data on the front end. Not as fun without the GIFs, but still an important part of the resume builder.

    Conclusion

    All in all, this was a fun project that I learned quite a bit on. You can find the source code for my resume builder on Github. Here are some thoughts I had after finishing the project:

    Since this was a JavaScript heavy project, the JS drove a lot of my decisions. The largest aspect driven by the JS is how the data is stored when you save the resume. Currently, it’s an array serialized in post meta, with both the field values and the field types. This makes passing the data to the JS really easy, however it isn’t in a great state if you want it to be searchable. If I had to do a project like this again, I would put more thought into how the data could be better stored.

    Backbone is a pretty useful tool, but I only really used Backbone Views in this project. I used Models for creating the Resume Builder on the initial page load, but after that, Models became pretty useless for me. I have a new appreciation for Backbone and a better understanding of appropriate uses, and even though it works in this project, it feels like the wrong choice.

    I hope this was an entertaining read for you, please feel free to checkout the source code on Github and leave a comment letting me know what you think and if I could have done something a little better.

    I’m Available For Work

    If you’re looking for a remote, backend developer, I’d love to chat! You can find my resume here and you can contact me through this form

  • How I Avoid Installing npm Packages Globally

    First, I take the installations instructions, but instead of installing globally, I install as a dev dependency inside my project (webpack used for this example):

    [fz_snippet snippet_number=1]

    Second, I check the node_modules bin directory to confirm that I have the webpack binary

    [fz_snippet snippet_number=2]

    That directory contains symlinks to all the binaries installed with npm for a specific project

    The contents of a node_modules/.bin directory

    Third, I create an npm script for easily running the binary found in step 2

    in package.json, add the following to your package.json file in your scripts:

    [fz_snippet snippet_number=3]

    Here’s how it looks in a project I setup:

    [fz_snippet snippet_number=4]

    Now you can run the following command from any directory in your project and it will run webpack for you

    [fz_snippet snippet_number=5]

  • Send a Pull Request to Another Fork on GitHub

    Send a Pull Request to Another Fork on GitHub

    Over the past few months, I’ve been working on merging the WordPress plugin SEO Extended into WordPress SEO by Yoast. The whole process taught me many great things about git, GitHub, and social coding. So today I’m going to share how to send a pull request to another person’s fork on GitHub!

    After I went through the effort of merging SEO Extended into my fork of WordPress SEO, I sent a pull request to the main repo on GitHub. Joost de Valk wanted to run a large beta test on the functionality added from SEO Extended, so he asked that I send a pull request to the fork maintained by Juliette Reinders Folmer. Figuring out how to send a pull request to the original repo I forked was hard enough, but after some blind clicking and guessing, I figured out how to send a pull request from my fork of WordPress SEO to Juliette’s fork of WordPress SEO.

    Here’s how you can send a pull request from your fork of a GitHub repo, to another person’s fork of that same GitHub repo:

    Step 1 – Go to the GitHub page of the other person’s fork and click “Pull Requests”

    The location of "Pull Requests" on a GitHub repo

    Step 2 – On the Pull Requests page, click the button labeled “New pull request”

    Location of the "New pull request" button on GitHub

    Step 3 – Click the “Edit” button and change the head fork and base fork.

    Edit the GitHub repos being compared in the pull request

    I don’t know many of the terms used in Git and GitHub, but from what I gather the head fork is the repo you want to send in the pull request and the base fork is the repo you want to send your pull request to. So I chose my fork (Faison/wordpress-seo-main) for the head fork, and Juliette’s fork (jrfnl/wordpress-seo) for the base fork. For my pull request, I was also asked to send it to a specific branch of Juliette’s fork, so I used the dropdown next to the base fork to select the appropriate branch.

    Edit the base fork and head fork of a pull request

    Step 4 – Click the area that says “Click to create a pull request for this comparison” and add a title and message.

    For this step, you want to make sure you tell the person what your pull request is for. So for mine, I used the title “Merged SEO Extended into WordPress SEO”, and just explained that it was the same as the first pull request I sent to the main WordPress SEO repo.

    Step 5 – Send your pull request by clicking the button labeled “Send pull request”

    Send your pull request on GitHub

    After pressing that button, you successfully sent a pull request from your fork to another fork of the same GitHub repository! The next step is to wait for that person to merge the request or reply for some follow up questions.

    Start Contributing Today

    Figuring this out started me down the path of contributing to WordPress SEO much more than I first anticipated and it’s why I look forward to contributing to many more WordPress plugins in the future. Unlike me, you don’t have to spend time shooting in the dark, trying to find out how to accomplish this task. Now that you know how to send pull requests to other forks of the same GitHub repo, you have another valuable skill to help your social coding on GitHub. So go to the GitHub repo of one of your favourite WordPress plugins and start sending your pull requests today!

  • New Windows Git Client for Bitbutcket: SourceTree for Windows Beta

    Good news, everyone! The people behind Bitbucket, Atlassian, are running a beta for the Windows version of their Git client called SourceTree. Right now you have to sign up by giving them your email and hoping they choose you, but it could very well be worth it!

    I haven’t tried SourceTree for Windows yet, but I got my copy and will try to do some testing to share the experience. On a related note, one of my co-workers says the Mac version is the best free Git client he’s used yet, so let’s hope Atlassian is still on the right track.

    So sign up for your beta access to SourceTree for Windows and tell me about your experience!

  • Small Update

    Well today was semi productive. I was able to get the ground work in place for the main I Don’t Give A Craft page. Unfortunately, Val’s computer had to be sent in for repairs, so it might be a little while before we have graphics for the page 🙁

    Even though Val is unable to work on digital art, we got a set of physical tools to help her make more detailed assets for the game.

    Thanks to these fancy blades, she can make crazier trees!

    And here’s a nice picture of lady parts

    That’s all for today. We’ll try to get something really special posted for tomorrow. Until then, follow me on twitter to keep up to date!