Author: Faison Zutavern

  • Programmer Art is Hard When You Can’t Draw

    Programmer Art is Hard When You Can’t Draw

    Day 5

    Today is a short day when it comes to number of things to accomplish, but long on how much time it takes to accomplish it. Time to add some animations!

    Some Ground Work

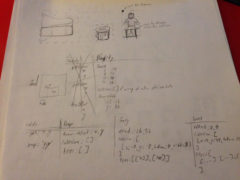
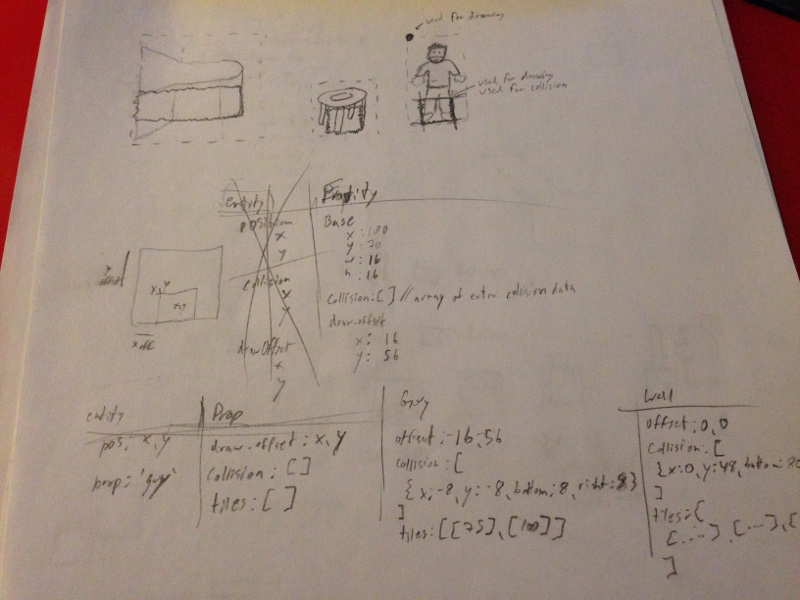
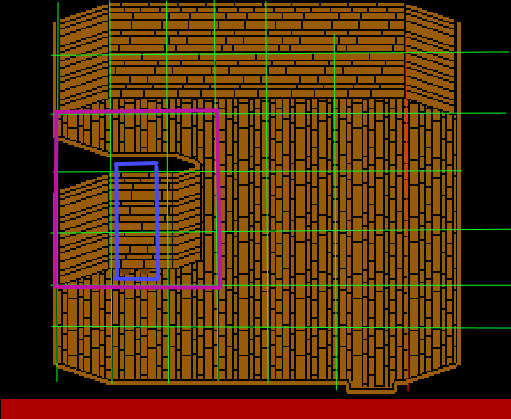
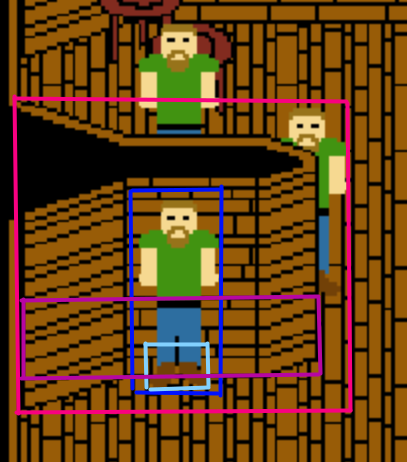
    Before creating the animation art, I needed to add some code to keep track of an entity’s current frame, the animation being played, and how much time until the next frame. For now, this is just added to the entity object as an object that contains exactly what I listed in the last sentence. In addition to that, I added the animation frame information to the shared prop objects, so no matter how many entities use a prop, they always have the correct animations already defined.

    After the data entry, the prop rendering function required some updates to make sure it renders the correct tiles of an animation frame. Believe it or not, all I had to do was check if the prop being rendered is animated (which I flag to the code with an object member called ‘animated’) and check if the entity being rendered has animation data (the frame, time to next frame and animation state). If we have that, then I just grab the tiles for the current frame and let the prop rendering code handle the rest.

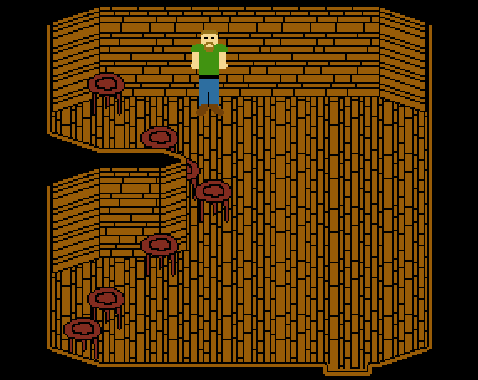
    Just so you know, I did this all with animation data that kept defining the same static image of a guy as a few animation frames. That way, I could confirm the animation code works before making some lovely programmer art.

    Programmer Art, Lots of Programmer Art

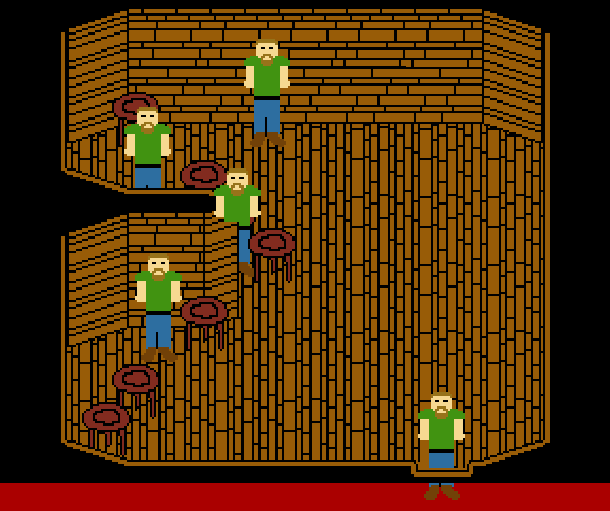
    So in the LDG discord chat recently, there was a bit of a discussion laughing about how everyone’s default idle animation was shrugging. So naturally I had to start with that. And it was really easy to do, move the arms a little down, then move the head a little down and now you have a shrugging guy.

    The animation with the wrong tiles specified

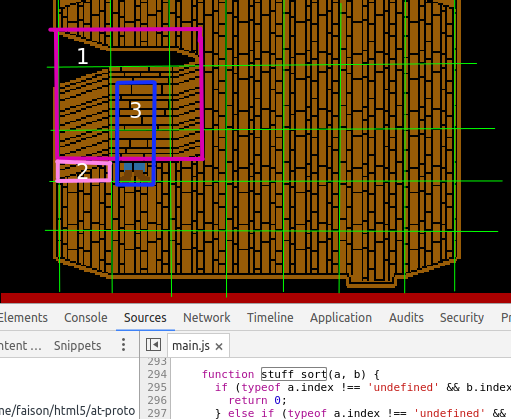
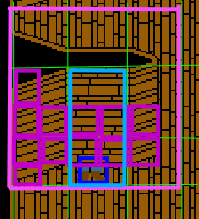
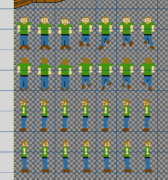
    Well, first I have to make sure each frame has the correct tiles specified.

    The guy's shrugging/idle animation

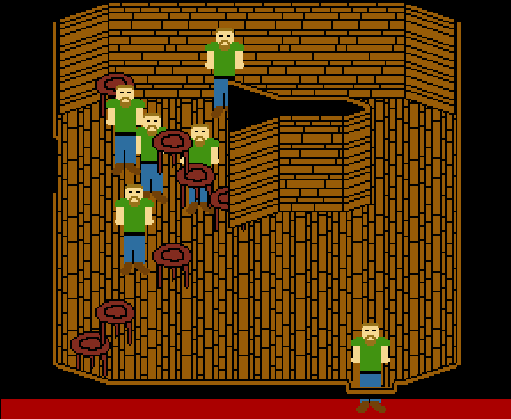
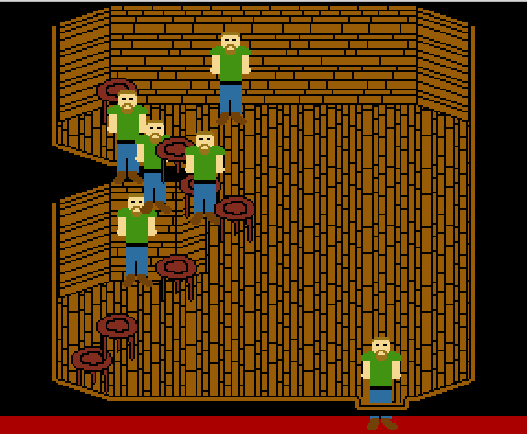
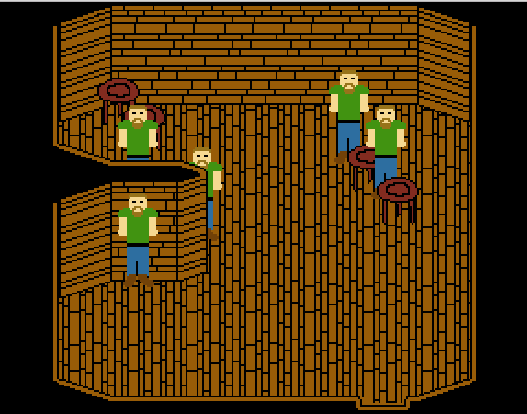
    With that done, it’s time to see what a room full of shrugging dudes looks like.

    A room full of shrugging dudes

    Well, they don’t call it programmer art for nothing… I call it a success!

    And Some More Programmer Art

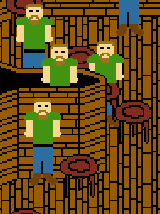
    With the idle animation done, it was time to add another animation. I went with walking downward.

    The walking down animation for a guy

    It actually turned out pretty good, considering art isn’t my thing. Now let’s make him walk upwards!

    The guy's up and down walking and idling animations

    Also seen in this gif is the “Idle Up” animation for when you stop moving after moving upwards. Needless to say, my walk down animation was a bit better than the walk up one.

    At this point, I spent a couple of hours making awful programmer art and wanted to just be done. So I just slapped some single frame “animations” in place for walking/idling left and right so I could call it a night and move on to other tasks.

    The walking and idling animations, along with placeholder left and right animations

    Summary

    Successes:

    • Animation code implemented
    • Walk down, walk up, idle down and idle up animations added
    • Stand-in left and right walking/idling “animations” in place also

    Potential plan for the next day of work:

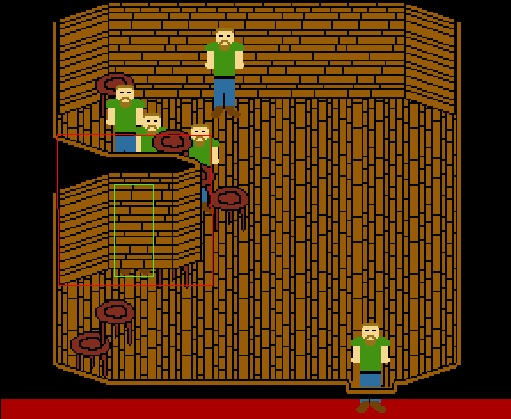
    • Add map triggers that trigger when walked on
    • Make the map trigger transition you to another room (maybe)

    Lessons Learned:

    • Art is hard
    • Add a one pixel wobble to your walk animation to make things look more lively (accidental find there πŸ™‚ )
  • Wall Collisions and Some Data Refactoring

    Wall Collisions and Some Data Refactoring

    Day 4

    For this day, the main plan was to add in map collision (to keep our player from walking off the map) and rethink and refactor how prop data is stored and used.

    Wall Collisions

    There’s really not a lot to say here. I treated the map collisions a little bit differently than props, in that the map collision data is ready to use right away, whereas the prop collision information needs to be translated based on the x,y position on the map. Because of that, I introduced a new function for getting collisions called get_collisions_v2(). The goal here is to update the prop collision code to use get_collisions_v2() during the refactor.

    Wall collisions

    One thing to note: That bug with the guy and stool on the far right is still present. Still ignoring it πŸ˜‰

    Data Refactor

    Up to this point, I had a lot of repeat data spread across each prop. Every stool on the screen has a copy of the collision data, the x and y offset used for drawing, and the tile number used for the stool. That’s not bad unless you need to make a change to one value across all of those stools. Pro tip: You always will need to make a change to one value across all of those stools.

    This is something that I didn’t trust myself to just get to coding on and have it work right away, so I went to pencil and paper!

    Pencil work for the refactor

    In the end, I settled on storing the x and y position and the prop name on an entity, and storing the draw offset, collision data and tiles on a prop definition. So there are currently three prop definitions: guy, stool and wall-1; and there are ten entities that take advantage of those prop definitions.

    And to make that change, I needed to update the code that handles rendering, draw order, movement and collisions. Basically everything I’ve put together at this point. But better now than later.

    Movement and collision after the refactor

    According to my time tracking app, that refactor took me about 2.5 hours and now I will have less duplicate data spread across the game’s code base. Also, if you look closely, you’ll see that theΒ draw order bug with the guy and stool on the far right is gone. It’s probably gone because I simplified the draw order sorting to use just the collision info in order to determine which prop to draw first. I honestly can’t be 100% sure though.

    Progress Summary

    Successes:

    • Map collision
    • Eliminated repeat data by implementing shared prop data
    • Accidentally fixed the draw order bug that happened with one of the guy’s and stools

    Potential plan for the next day of work:

    • Animated props
    • Prop states (idle, walking, pushing)

    Lessons learned:

    • Sometimes if you ignore a bug, a future refactor will make it go away
  • Keyboard Movement and Collision

    Keyboard Movement and Collision

    Day 3

    For this day, my plan was to implement keyboard control and basic collision detection/correction. WARNING: Thar be GIFs here!

    Keyboard Controlled Movement

    Turns out this was a lot easier than I thought it would be. First, I created a new module that listens for keydown and keyup events, checks if the event is for one of the arrow keys, then updates a module level controller object to flag which arrow keys are pressed. Then, I added a player prop (separate from all the other props rendered on screen), checked if the controller object had any arrow keys set to true and updated the player prop’s position.

    At this point, I needed to test something I thought might kill performance: For every game tick, clear out the ‘in-air’ render group (the one with all the props in it), re-add all the props back in, as well as the player prop. Turns out, the browser didn’t really care and ran like normal πŸ™‚

    Here’s a gif showing the success:

    GIF showing movement with no collision

    I saw one bug right away with the guy and stool on the far right of the room. When the player prop is on the same y level, that guy and stool swap draw orders. My initial thought is that issue will go away if those two props aren’t constantly colliding with each other, but I can deal with that some other time.

    Collision Time

    There are a lot of fancy and performant ways to detect collisions, I did not implement one. For this project, my #1 Dev Rule is this:

    First make it work, then leave it alone. If it gets in the way of something else, then make it work with that other thing and leave it alone again.

    So I wanted to just put in place a basic means of detecting and correcting collisions and worry about performance later. Here’s how I detected collisions:

    1. Take the player’s collision block and an array of all the other prop’s collision blocks
    2. Loop over each prop’s collision block and stash it in an array of collisions if an AABB collision check with the player returns true
    3. Return the array of collisions

    That code will not scale well. I could implement something like a Quadtree, which would go before step 2 to first determine which props are actually near the player and eliminates the need to check the player against all props on the screen, but that would go against my #1 Dev Rule. So I just made sure to wrap all that logic in a function called get_collisions() so when my collision detection gets in the way of performance, I can refactor without causing issues for other code.

    Collision Correction

    Now that I’m detecting collisions, I need to make sure the player can’t move into those collision blocks. In the future, I will want to tie more things into the collision detection so that, for example, the player will show a “Pushing” animation if he’s running into a wall, but the first step of that is to make the player stop when he collides with something.

    So the premise is kind of simple: If the player’s collision block moves 2 pixels into another collision block, move the player back 2 pixels.

    A collision example to show when to correct on the y axis

    In this example the pink square is colliding with the blue square. The red lines show how much the pink square is colliding with the blue square on both the y axis and x axis. Since the y axis collision length is smaller than the x axis collision length, we will move the pink square down by the length of the shorter red line.

    As I implemented that type of collision correction, I quickly determined that it didn’t really work for the pink square colliding on all sides of the blue square, so I ended up with something like this:

    A collision example showing collision lengths between all sides

    So for this, I’m comparing the distances between opposite sides on the same axis: pink top with blue bottom, pink left with blue right, etc.. I don’t know if this is any type of a standard, but it solves the issue better than what I found originally with the first example image above. So in this example image, I determine that the distance between pink left and blue right is the smallest distance and I move the pink square by that distance to correct the collision.

    Here’s what it ended up looking like in the game:

    The collision in game, not quite working right

    So this is a direct result of my #1 Dev Rule for this project. To get movement working, I added a new x and y value to the player prop that contains the full x and y position with its decimal values. When drawing the player to the screen, I only want to draw on exact pixel values without any decimal (I’m pretty sure there’s a reason for this, but you’ll have to look it up to find out why), but to make sure movement is smooth I track the full x and y position as well. In my collision correction code, I’m only correcting the x and y value that’s used for drawing. So while the player doesn’t move while colliding, it’s actual position value keeps moving until the player ends up on the other side of a collision block.

    Simple correction though, make sure the movement x and y values are corrected (this will be refactored later).

    The collision code now works between two props!

    Now I just need to add in all the other props again.

    Collision between three props isn't working yet

    Remember that #1 Dev Rule? Yeah, I was only correcting the first collision returned in a tick. In the gif above, I need to correct for two collisions…

    Collision correction fully working

    There we go, I’m no longer throwing out all collisions after the first collision! I can now rest easy.

    Progress Summary

    Successes:

    • Keyboard Movement
    • Player collides with props

    Potential plan for the next day of work:

    • Add map collision data
    • Make player collide with map
    • Start refactoring position code so there are fewer x and y values floating around

    Lessons learned:

    • That whole “Don’t prematurely optimize” saying keeps you productive, just make sure you code in a way that will let you optimize later
  • Draw Order for Sprite Rending is Nuts!

    Draw Order for Sprite Rending is Nuts!

    Last Time (and a little bit after that)…

    The last time I worked on my Jamuary game, I planned on drawing all props (1-tile-high stools, 2-tile-high characters, and 3×3-tile walls) all on the same layer. Due to how my code was originally written to draw different “heights” of props at different layers, my initial refactor looked a bit out of order πŸ™‚

    Some time after sharing that screenshot in the LDG discord, Vox (the main driving force behind Jamuary) gave me the following tip:

    I don’t know what you’re using, but everything in my game has a rendering group. Before my entities go to my rendering system they are sorted into groups, then each group is sorted by their y + height value. This allows me to ensure everything is ordered correctly on rendering. Let me know if you need any help and I’ll do my best πŸ™‚ Other people in here probably have way more advanced stuff you can do, but this is the simplest solution I could figure out on my own.

    Before I read that, I was thinking over how the following scenario would work:

    • A small 1×2 character is battling against a large 6×4 boss
    • The character moves to the bosses face to slash the boss, then runs back to his original position

    With my current rendering system, which groups all Props together, the character would be hidden beneath the boss for most of the movement and attack. So render groups would allow me to stick the boss in a group that always renders before the group that the character is in. Perfect!

    Day 2 (of working on this)

    So here was my plan for render groups:

    1. subfloor – Why not? maybe something in a hole that needs to be below the map could go here
    2. floor – Always the base level of rendering, only used for the map
    3. on-floor – will only be above the floor, always renders below the in-air render group (think a giant boss that PCs need to be seen above)
    4. in-air – Main render group for props, characters, and map walls (glorified props)
    5. roof – Always rendered on top, typically ceiling tiles, also only used for the map
    6. super-roof – Why not again?

    This is the order that the groups will render, ensuring that props will always be on the floor and ceiling tiles will always be on top of props. Now I don’t really like the name ‘on-floor’, but it’s what I got for now (search and replace will take care of that later).

    Before I bother with render groups though, I need to fix that monster shown above.

    The position of this wall is a bit off

    Ok, just need to move that wall to the correct spot. Luckily the wall prop is grid aligned, so this should be easy…

    Just gotta get that wall in the right place...

    At this point, I realized that my y-sort ordering isn’t perfect for my use case.

    The y-sorting isn't perfect

    So the bottom of the guy (boxed in green) is below the drawn portion of the wall, but it’s above the bottom of the entire wall prop (boxed in red). So I shared this shot and my realization with the LDG chat, and before I could start to think of a solution, Vox came in again with an awesome bit of knowledge:

    you need to bound your sprites to the ground. Think of your space like a 3d space even though it’s in 2d. Give your sprites a 16 x 16 base and don’t allow them to be in areas that aren’t technically inhabited by something else.
    In other words that wall should have some bounding areas that can be compared against for collision as well as drawing purposes.

    This took me some time to digest. So rather than explain my thinking process, allow me to show you some screenshots that hopefully express what my brain went through.

    So we have some tiles on a grid with tiles that are 32x32

    I could just make that bottom left tail think its own prop

    Oh, ground the props with some collision boxes that are then compared

    Alright, I was starting to grasp this. Instead of using the prop’s full y and height, just use a “collision block” for a prop to determine the y-sorting. For small props (1×1, 1×2) there will only be one “collision block”, but for larger props (like that 3×3 wall), there will be a collection of “collision blocks”.

    Before doing that, I need to get things rendering in their proper render groups, which took a bit of refactoring but made my code look nice.

    rendering with render groups

    So two render groups are special groups for map data (floor and roof) and all the props/characters are another layer so I can do a rough y-sort for props that don’t have an AABB collision (look it up). The next step is to dive into “collision” data for sorting out any props that have an AABB collision. Here’s an image showing how it works

    How the AABB collision check works

    So first, the engine detects a collision between the guy’s bounding box (the blue box) and the wall’s bounding box (the hot pink one). It then grabs the collision object for the guy (the light blue box) and the wall (the purple box). If those collision boxes are colliding (which they wouldn’t in the game, but it’s good to have fallbacks) I use the center of both collision boxes to find out which should be behind the other. In this case, the wall’s collision center has a lower y than the guy’s collision center, so the wall is rendered first. If there isn’t a collision, then I y-sort by the collision boxes.

    All in all, it ended up working!

    Render order working!

    Progress Summary

    Successes:

    • Got amazing tips from Vox (Thanks!)
    • Implemented render groups to make sure some things always render on top of other things
    • Got render order working properly with a combination of rough AABB checks, then more detailed collision AABB checks

    Potential plan for the next day of work:

    • Get one of those guys moving
    • Make the guy controlled by the keyboard

    Lessons learned:

    • Always discuss things out loud with other people working on the same stuff. Odds are they will be happy to share you some knowledge that will fast track your progress
  • Jamuary 2017 Start!

    Jamuary 2017 Start!

    A few days ago, I started working on some prototype code for a basic Super Nintendo-style 2D RPG made with HTML5, and what better a way to keep it going than to participate in a game jam? So I’m going to post my progress as well as my process of building this prototype RPG for Jamuary (check out the jam for details).

    2D Render Engine Progress

    Pre Jam Work

    I decided to tackle the rendering engine first, since it will allow me to see what’s going on with code changes without having to analyze a lot of data.

    To make things “simple”:

    • The game will be tile-based and will use tiles that are 32×32
    • Maps will be created with a combination of tiles
    • Map tiles are layed out on a grid
    • Props (random objects decorating the map) will typically be rendered with 1 tile
    • For some props and most characters, they will be rendered with 2 tiles
    • Props and characters are not locked to a grid

    To avoid coding without knowing where I’m going, I first started making some programmer art in GIMP (I’m not an artist). I created a guy and a little room.

    First render of a room and character

    With that drawn out, I chopped out individual tiles and exported them as a spritesheet, loaded it in with javascript, and used an array to build out the room. The above image is actually from the in-progress rendering engine. This was technically pre-jam progress, since I completed this work at the end of December.

    Day 1

    With the start of the Jam, I decided to make sure that Characters and Props are drawn in the correct order. So if a Character is in front of a stool, the stool will be under the character. Or if there’s a wall in the room, props and characters will render on the correct side of that wall.

    First, I hopped into GIMP and tried to wrap my head around how the draw order would work.

    GIMP test to figure out draw order

    Since I want a wall in the middle of a room that can cover parts of Characters and Props, I can’t get away with one two-dimensional array with the map data. So I updated the map data to be three two-dimensional arrays and updated the rendering engine to loop over all the map data.

    With the map rendering properly, I needed to insert the props between map layers. This was my initial rendering workflow for the map and 1-tile-high props:

    1. Draw the base layer of the map (map[0]
    2. Loop over each row of the second layer of the map (map[1])
      1. Draw the row
      2. Get all props whose bottoms are contained in the row
      3. Sort the props, found in 2.2, by their y values
      4. Draw the sorted props from 2.3
    3. Draw the top layer of the map (map[1])

    And it worked (the guy is still being rendered in a dumb way)

    Rendering stools with proper draw order

    To get 2-tile-high characters and props rendering with the proper draw order, I took a guess that this would work as an update to the previous workflow:

    • In 2.2: don’t just get the 1-tile-high props that are contained in the row, but the bottoms of the 2-high-props too
    • In 3: follow the same flow for 2, but when getting props, get and draw the top tile of 2-tile-high props

    And it was pretty close:

    Rendering guys with the initial draw order workflow

    I just need fix the draw order bug seen in with the middle guy and that center wall. My initial thought was that for the top layer I need to reverse the order of draw so that Characters and Props are drawn before a tile row. When I tried that, the middle guy looked correct, but the bottom-left guy’s head was in the wall.

    Since I run into issues if I just draw the top layer of Characters and Props before or after the map tiles, clearly I need to sort the drawing of map, character, and prop tiles by their y values. Here’s an initial swing at that:

    First take at sorting all tile drawing by y values

    There are two bugs that I see:

    1. The top tile of a 2-tile-high character has incorrect draw sorting for the middle guy
    2. Looks like there’s a little issue with depth sorting and the bottom tile of a 2-tile-high character and a 1-tile-high prop (middle-right guy and the stool-thing)

    At the end of that day, I tried to resolve that draw order issue by comparing the full bottom y value of a character with the bottom y value of a tile plus 32 times the map layer, no dice though. But I was done working on this for the day. Hopefully the next time I can get around the draw order issue, but we’ll have to wait and see.

    Progress Summary

    Successes:

    • Have some sprites for a room, a guy, and a stool/table/thing
    • Rendering the multi-layered map from a hardcoded array of two-dimensional arrays
    • Rendering 1-tile-high and 2-tile-high props and characters on their correct layers

    Bugs:

    • Draw order for the top tile of a 2-tile-high character isn’t working right

    Potential plan for the next day of work:

    • Instead of drawing walls and 2-tile-high characters and props in 2 layers, just use 1
    • Instead of using the top layer for the top of walls (which are technically 2-tile-high walls), just use it for tiles that will always be rendered ontop of characters and props